Last edited on Jun 30, 2021
Bluehost
Access the DNS Zone Editor
Log in to your Bluehost control panel
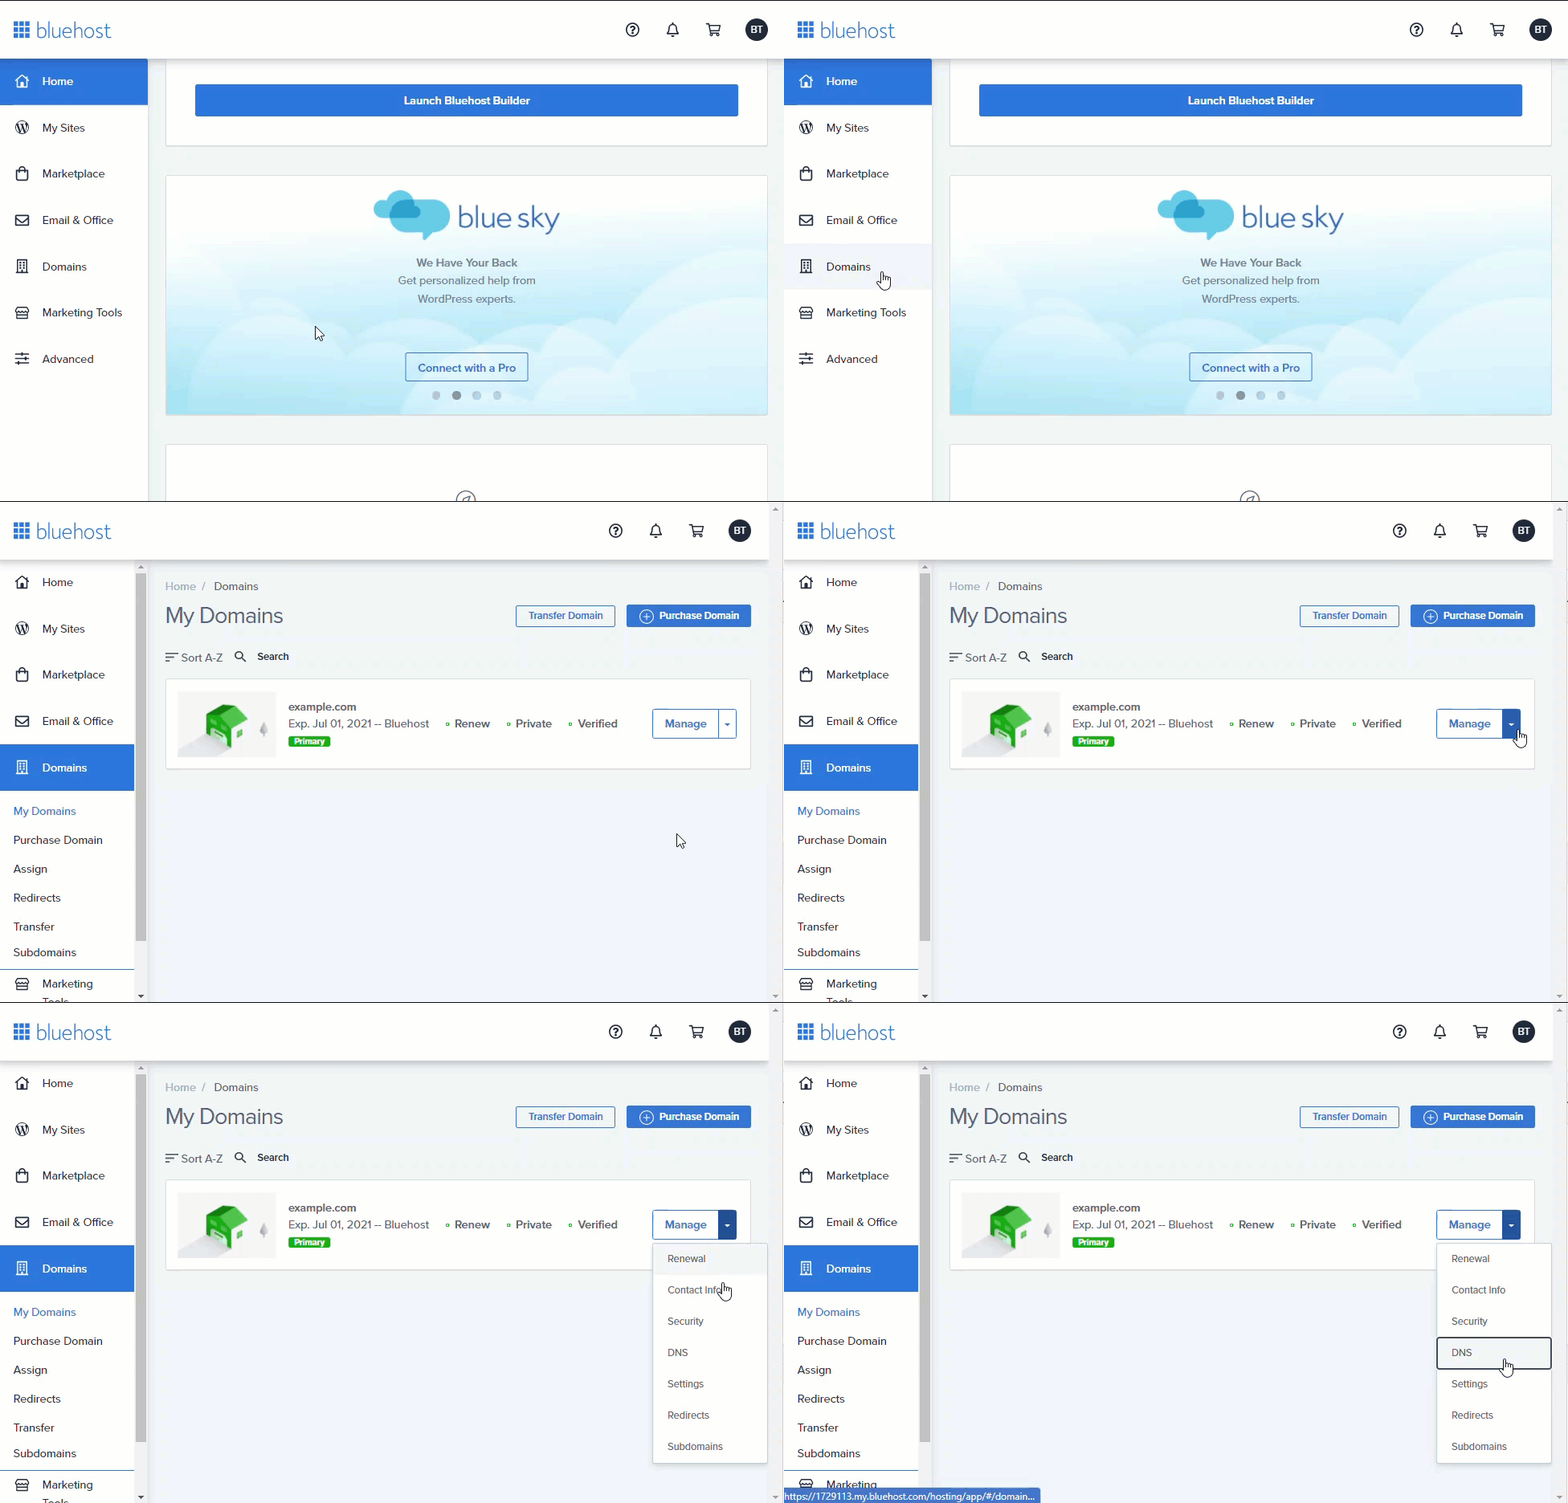
Click the Domains tab from the side navigation menu to the left.
Next to the domain name you wish to update, click the ▼ icon next to Manage, then choose DNS from the drop-down menu that appears.
Instructions on how to enter the DNS Zone Editor
Add new record
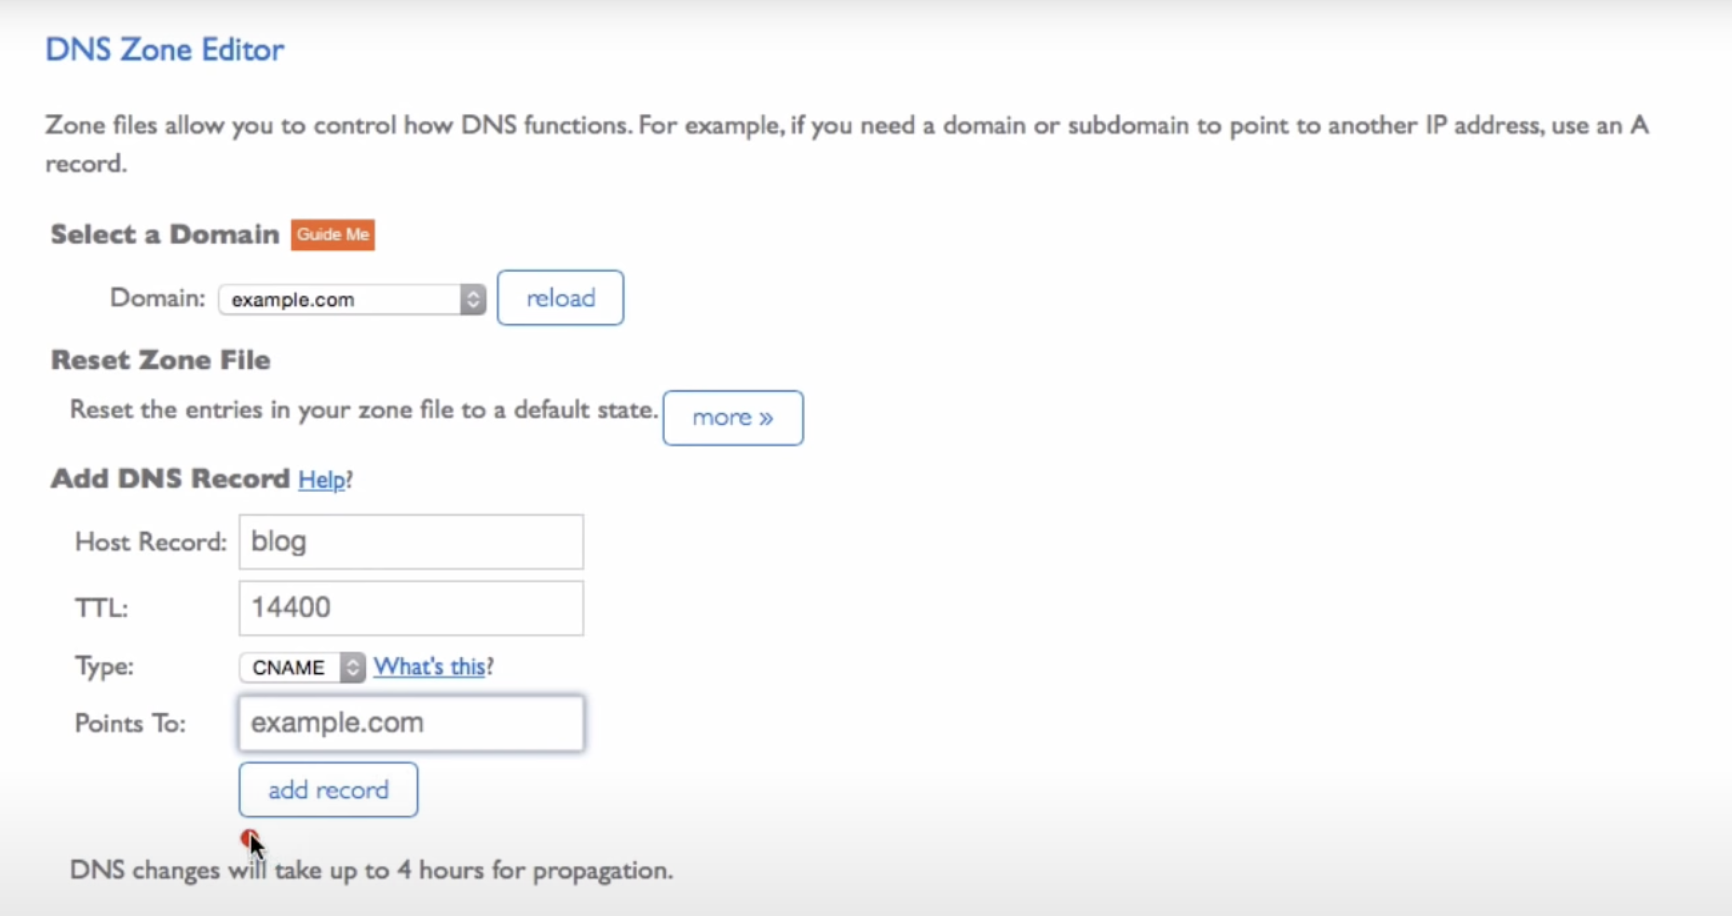
After you have entered the DNS Zone Editor, scroll down to locate the record type you wish to update, and click the Add Record button.
Add record button
Add a CNAME
For example, if you see the instructions to add:
You will be able to add a DNS record like this:
Host Record:
www(This might be different for you)TTL: Keep the default
Type:
CNAMEPoints to:
render-36alh.ondigitalocean.app(this might be different for you)
Other Resources
Reach out to us by clicking on Help & Resources at the bottom-left corner of the editor for help.
We're a remote software company, building online tools for creators, builders, and side hustlers. We quit our 9-5 to pursue our dreams, and we want to help others do the same.
Copyright © 2025 beehiiv, Inc. All rights reserved.


