How to track button clicks for Panelbear
A guide on how to get advanced analytics data to your site
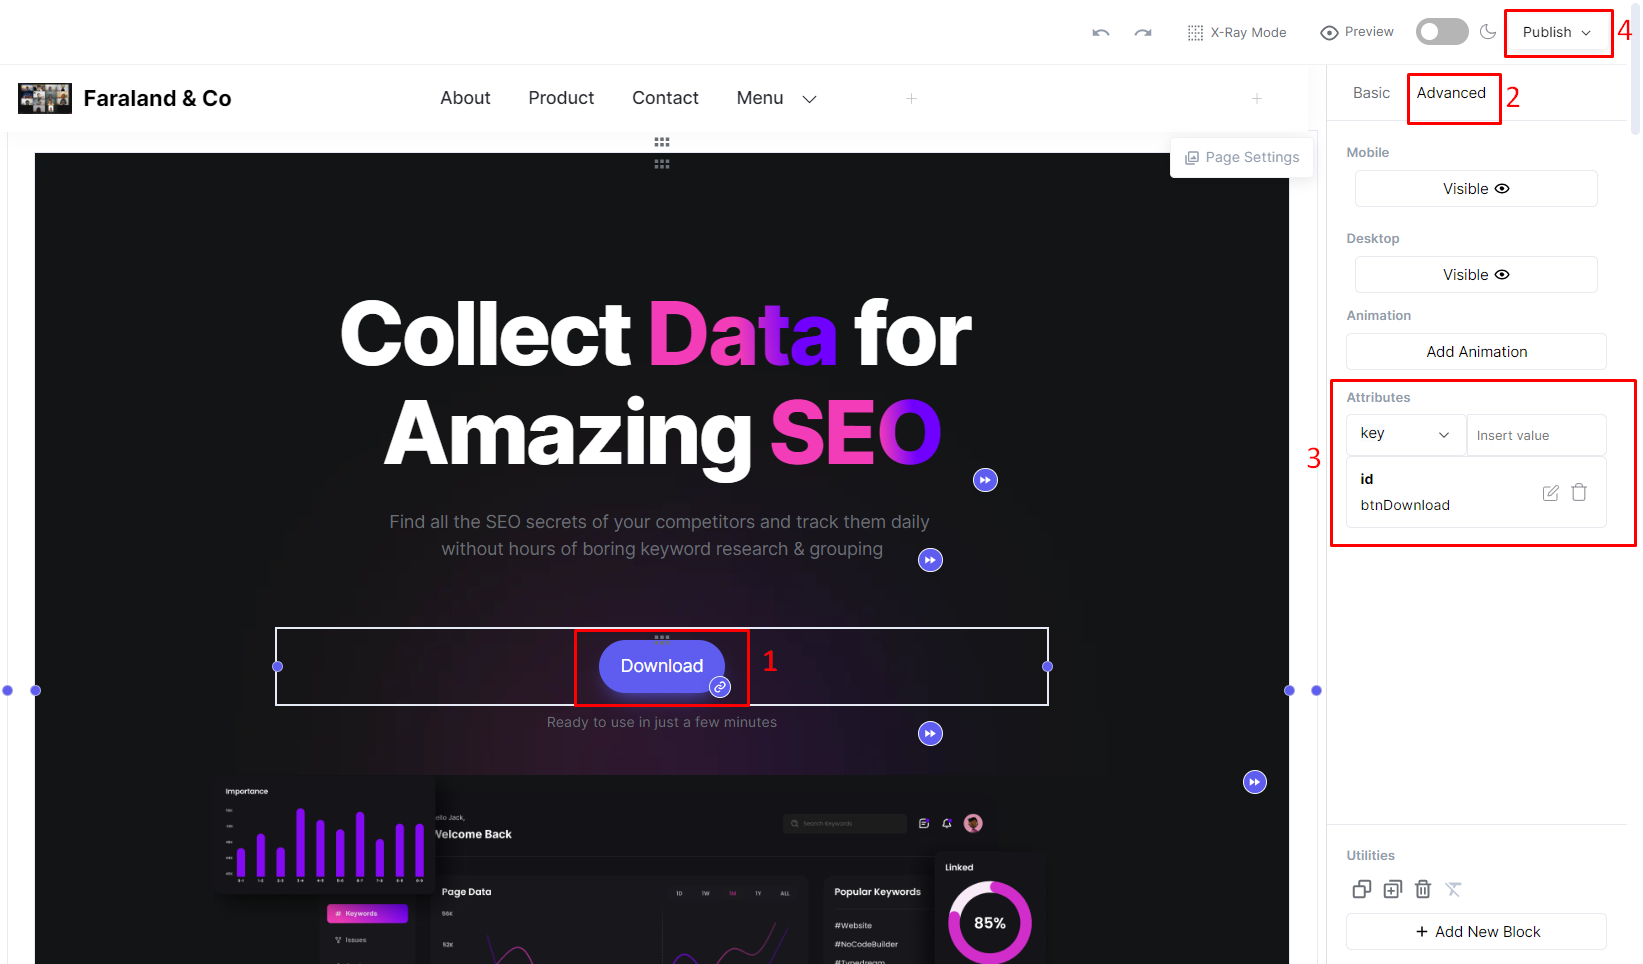
Step 1: Select a specific block to be tracked
Select a specific element to be tracked in Typedream and go to Advanced Settings -> Attributes and add attributes to the block
Step 2: Create a Panelbear account
Create a Panelbear account if you don't have an account via the following link : https://app.panelbear.com/signup/
Step 3: Add your website
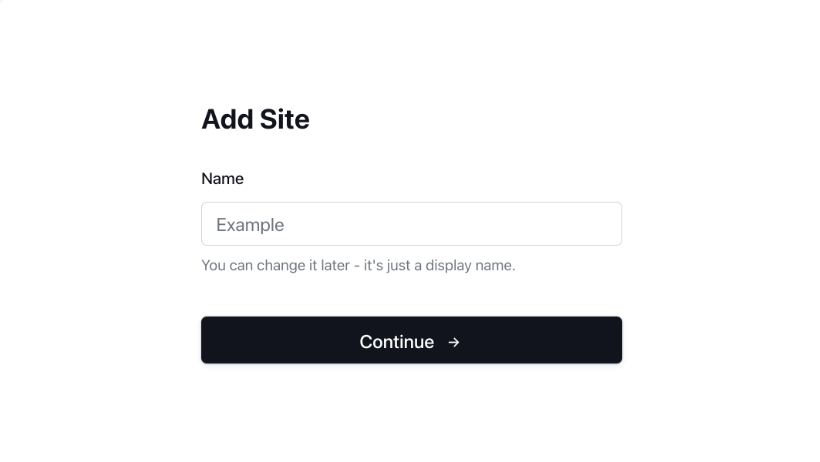
- Your first website If it's the first website you register on Panelbear, you should be shown the following form anytime you access the dashboard:
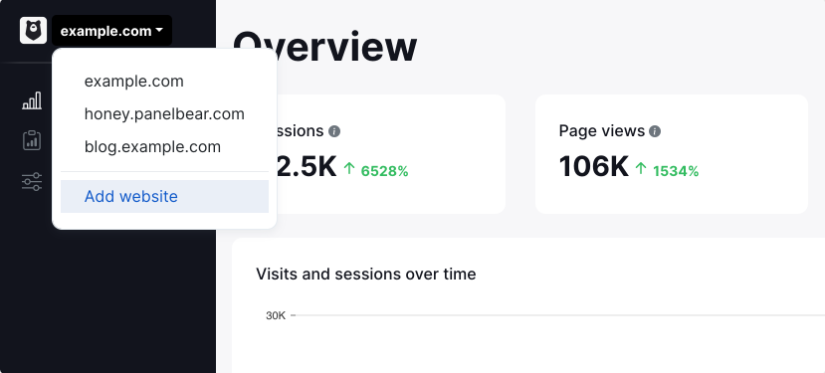
- Adding more website If you already own multiple websites on Panelbear, you will find the form to add new sites at the bottom of the site selection dropdown:
Step 4: Install integration script for your website
Installing the analytics script on your website is super simple. All you need to do is:
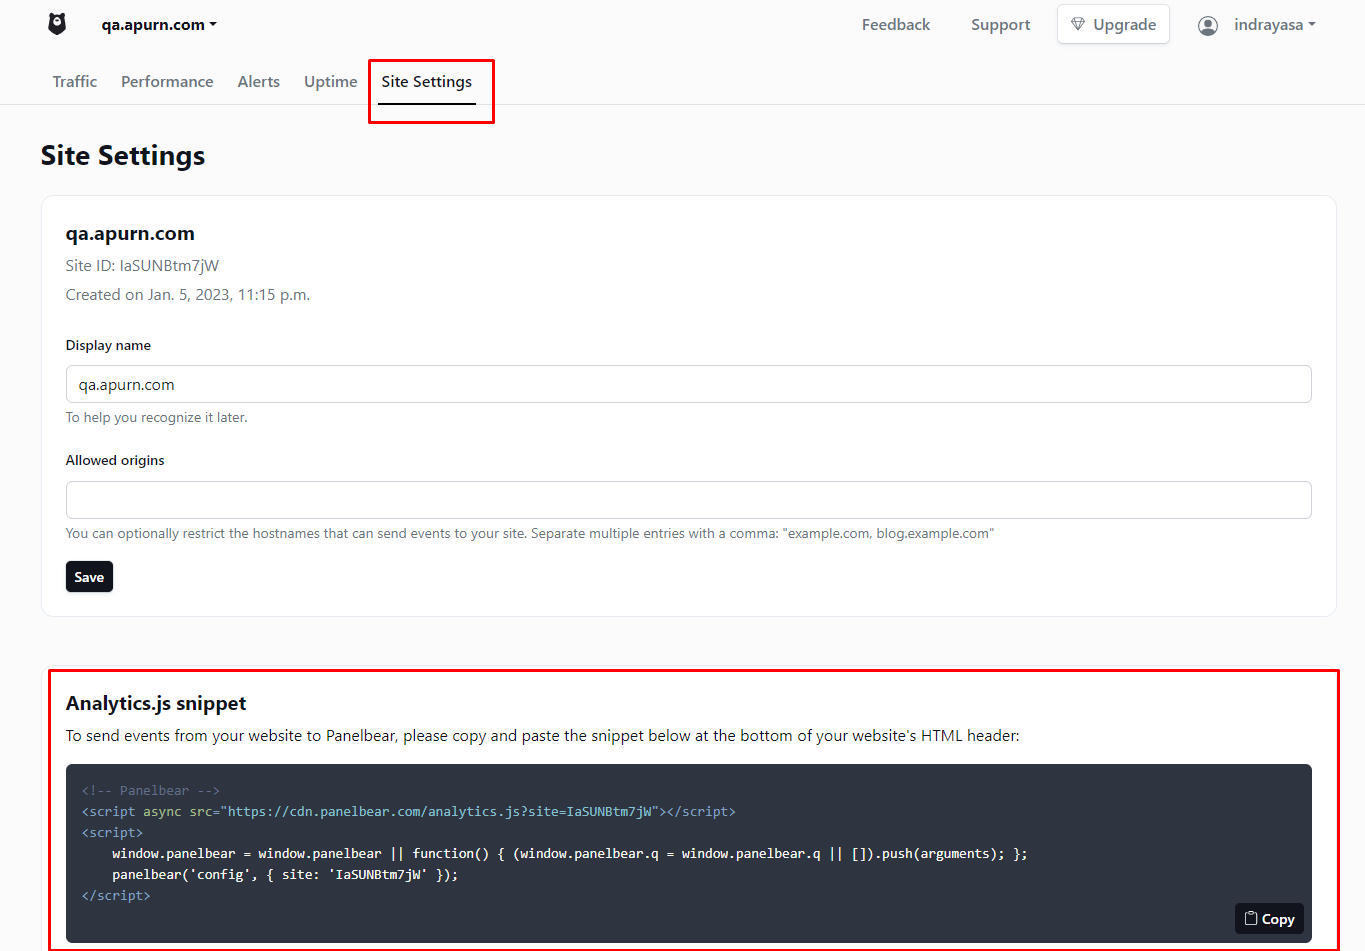
- Go to the settings page for the site.
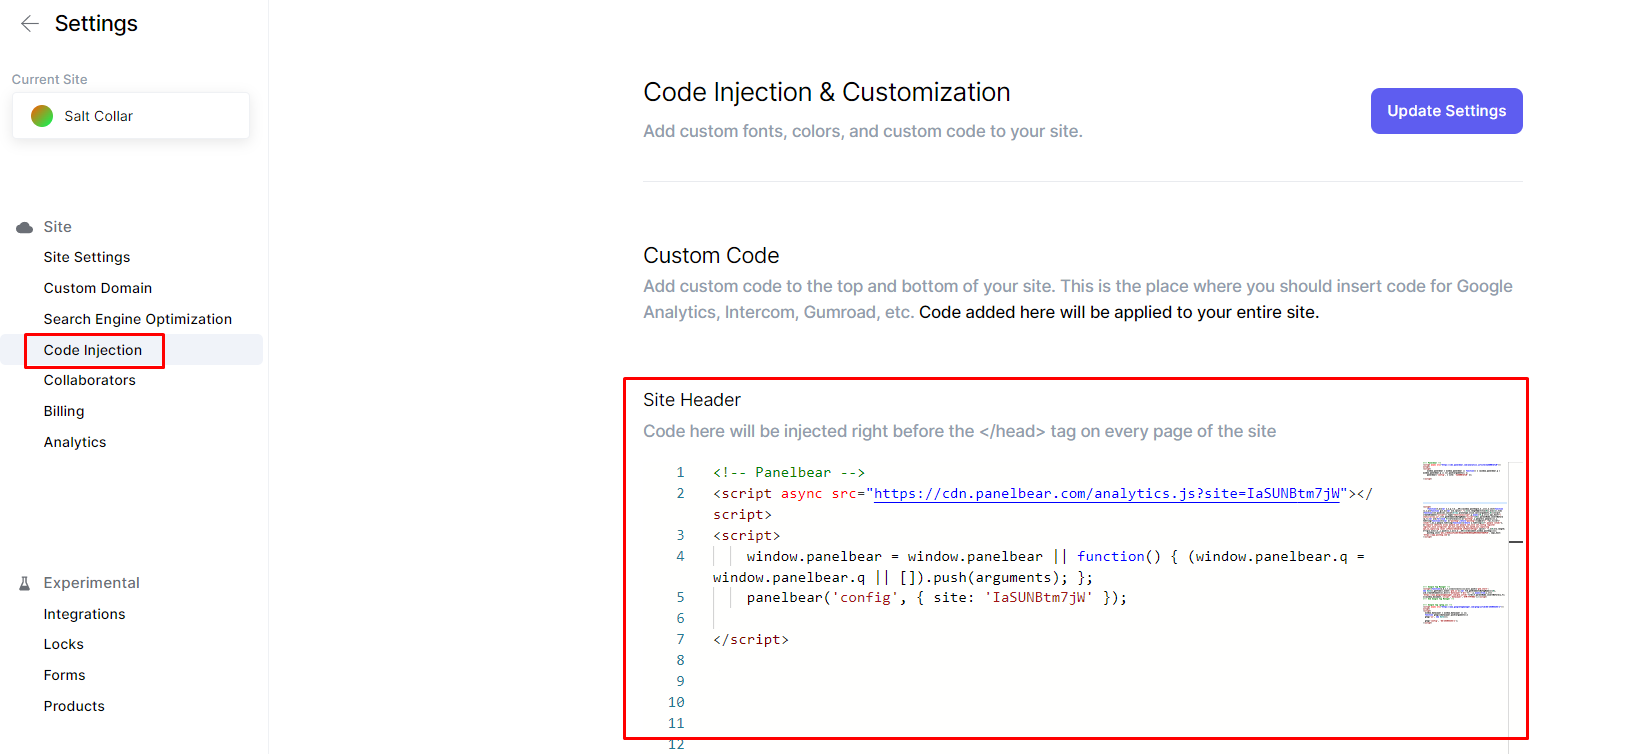
- Copy the snippet shown in the Analytics.js snippet section.
- Paste the snippet on site setting -> code injection -> update setting -> publish your site
After you have added our analytics script to the HTML of your website, you should be able to see pageviews show up in the dashboard within a minute of the visitors coming into your website.
Step 5: Sending an event
You can already make use of custom events with the default Panelbear installation. No additional steps are necessary besides the basic installation. To send a custom event, simply call the track command on your Panelbear script. For example:
For the example above, a Signup event will be recorded for the current visitor session. Conversion rates, and other derived metrics are automatically updated for you in real-time.
The track command takes a second argument, which is the name of the event being tracked. You can name the events however works best for you. But keep in mind that this is the same name that will show up on your dashboards.
Step 6: Triggering events on button clicks
It's completely up to you when to trigger the custom events. You could listen for a button click, scroll action, form submission, and pretty much anything you can think of.
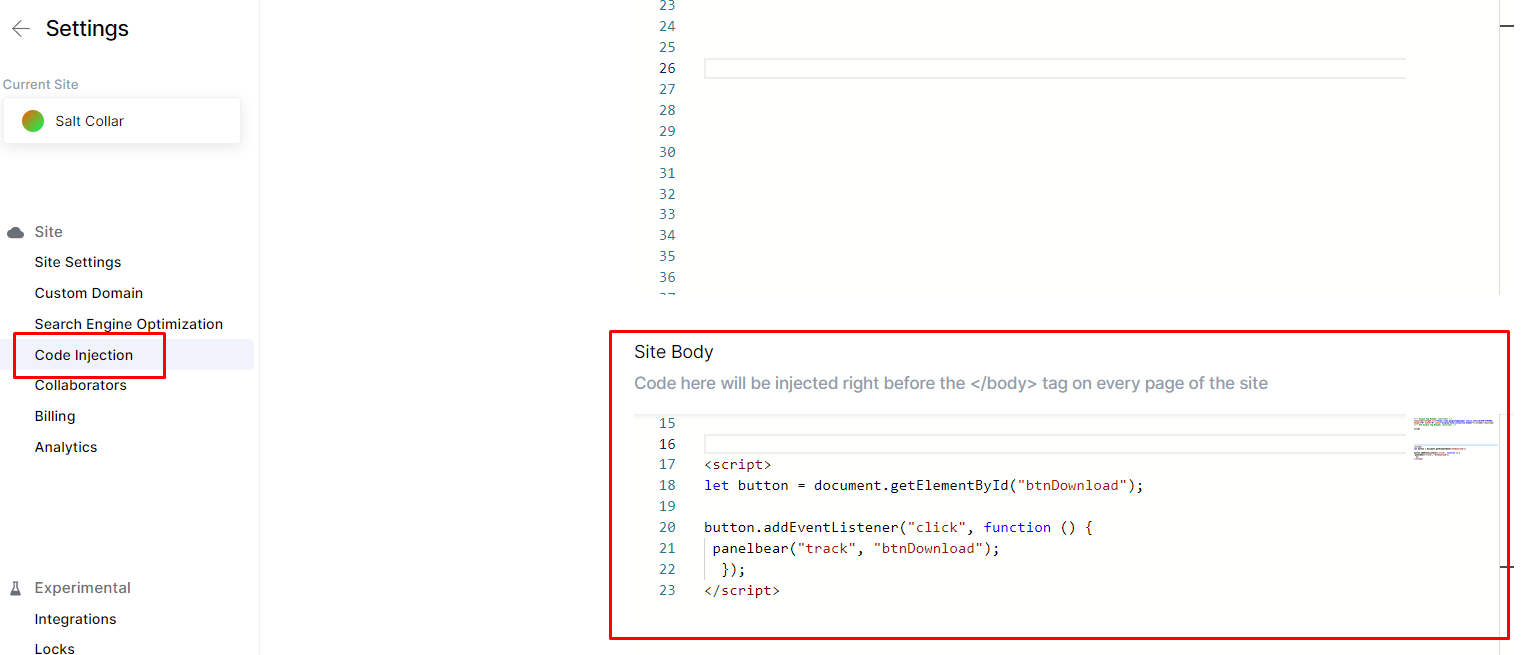
<script> let button = document.getElementById("btnDownload"); button.addEventListener("click", function () { panelbear("track", "btnDownload"); }); </script>Code to add to the Code Injection section on your Typedream site
You can add a track button script in site settings -> code injection
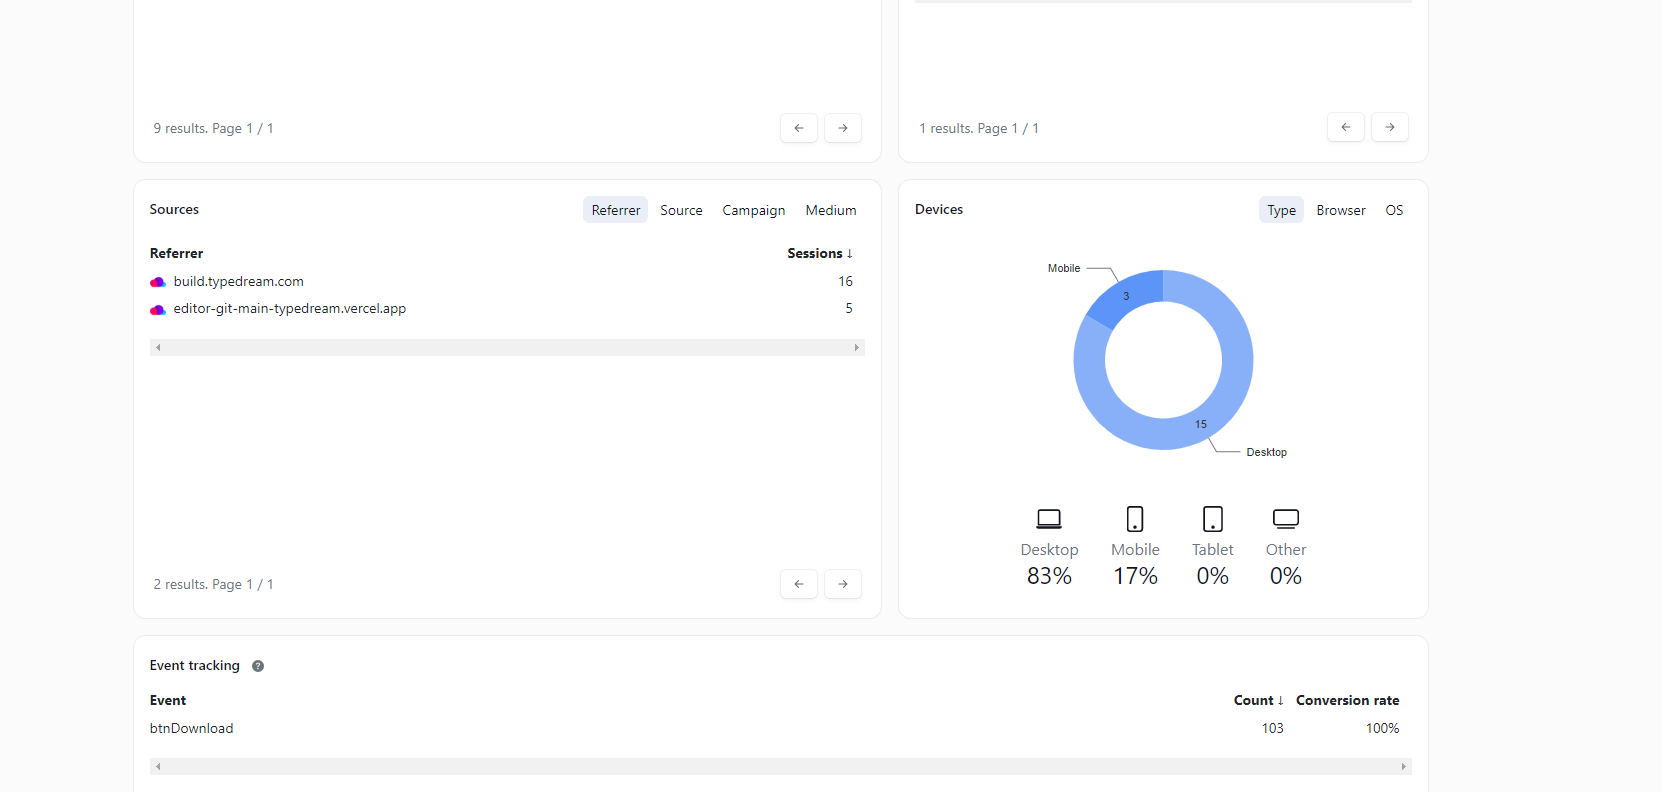
Step 6: You should be able to see Events showing up in tracking events at the traffic menu.
That's it! 🎉
Your link should now be able to see the button click events in your analytics provider.
We're a remote software company, building online tools for creators, builders, and side hustlers. We quit our 9-5 to pursue our dreams, and we want to help others do the same.
Copyright © 2025 beehiiv, Inc. All rights reserved.
Made in Typedream
