How to track button clicks for Google Analytics
A guide on how to get advanced analytics data to your site
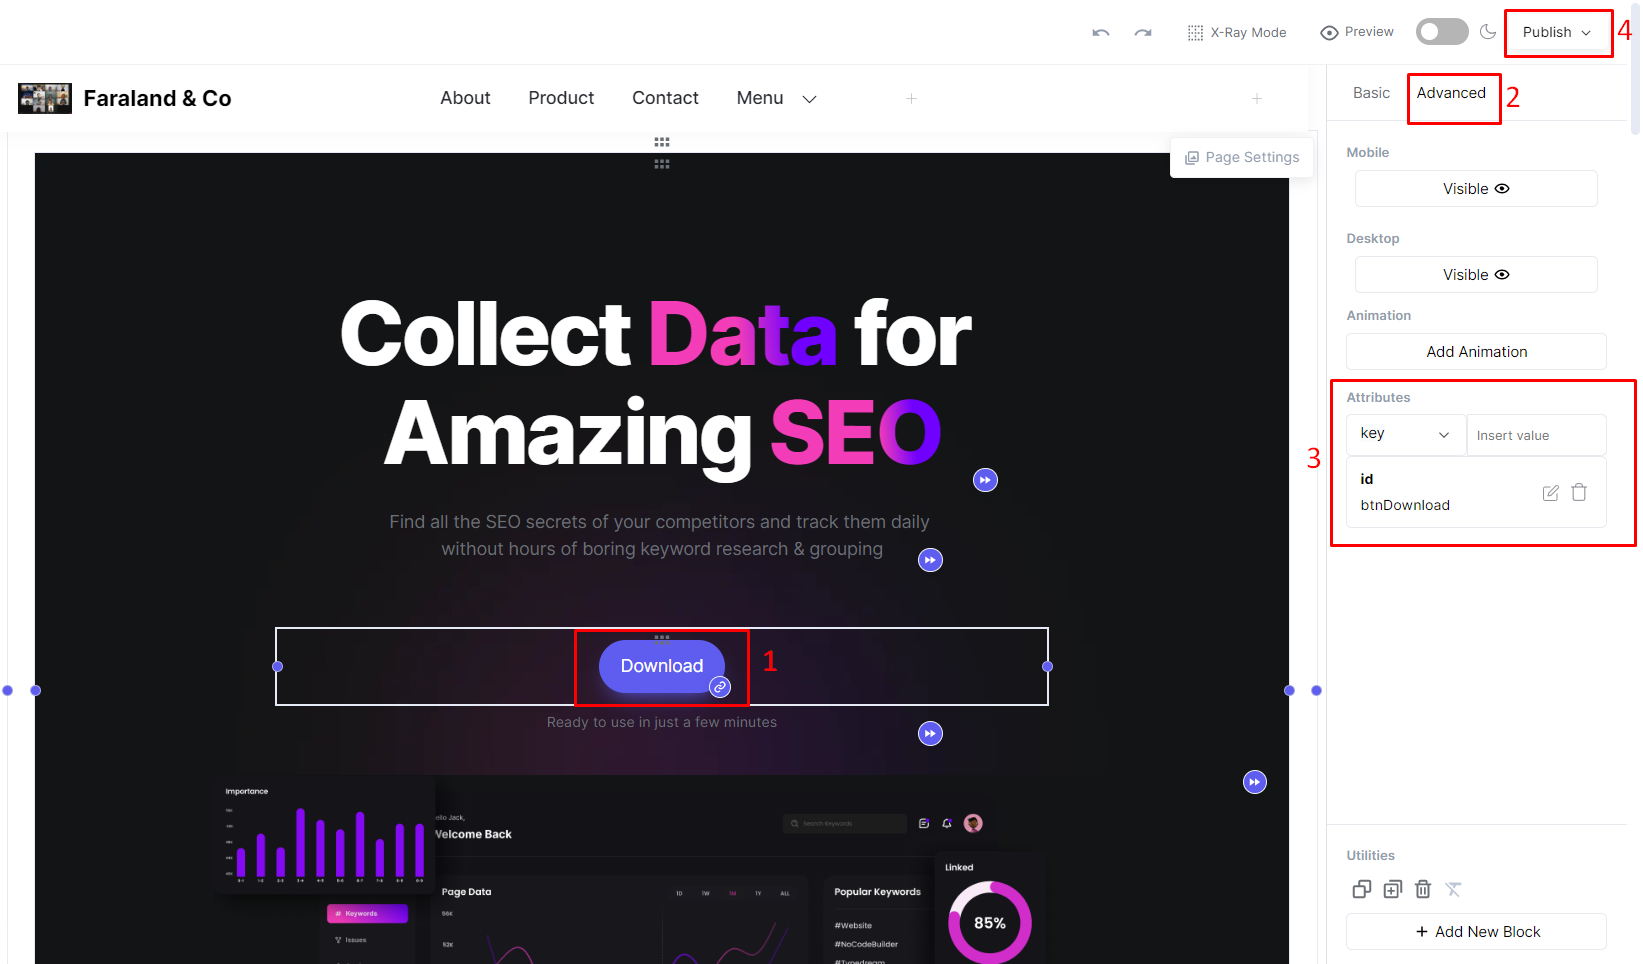
Step 1: Select a specific block to be tracked
Select a specific element to be tracked in Typedream and go to Advanced Settings -> Attributes and add attributes to the block
Step 2: Create a Google Analytic account
- Create a Google Analytics account if you don't have an account via the following link : https://analytics.google.com/analytics/web/provision/?hl=en-GB&pli=1#/provision Make sure the property you create is a Universal Analytics property. The steps for setting the property can be seen here: https://support.google.com/analytics/answer/10269537?hl=en
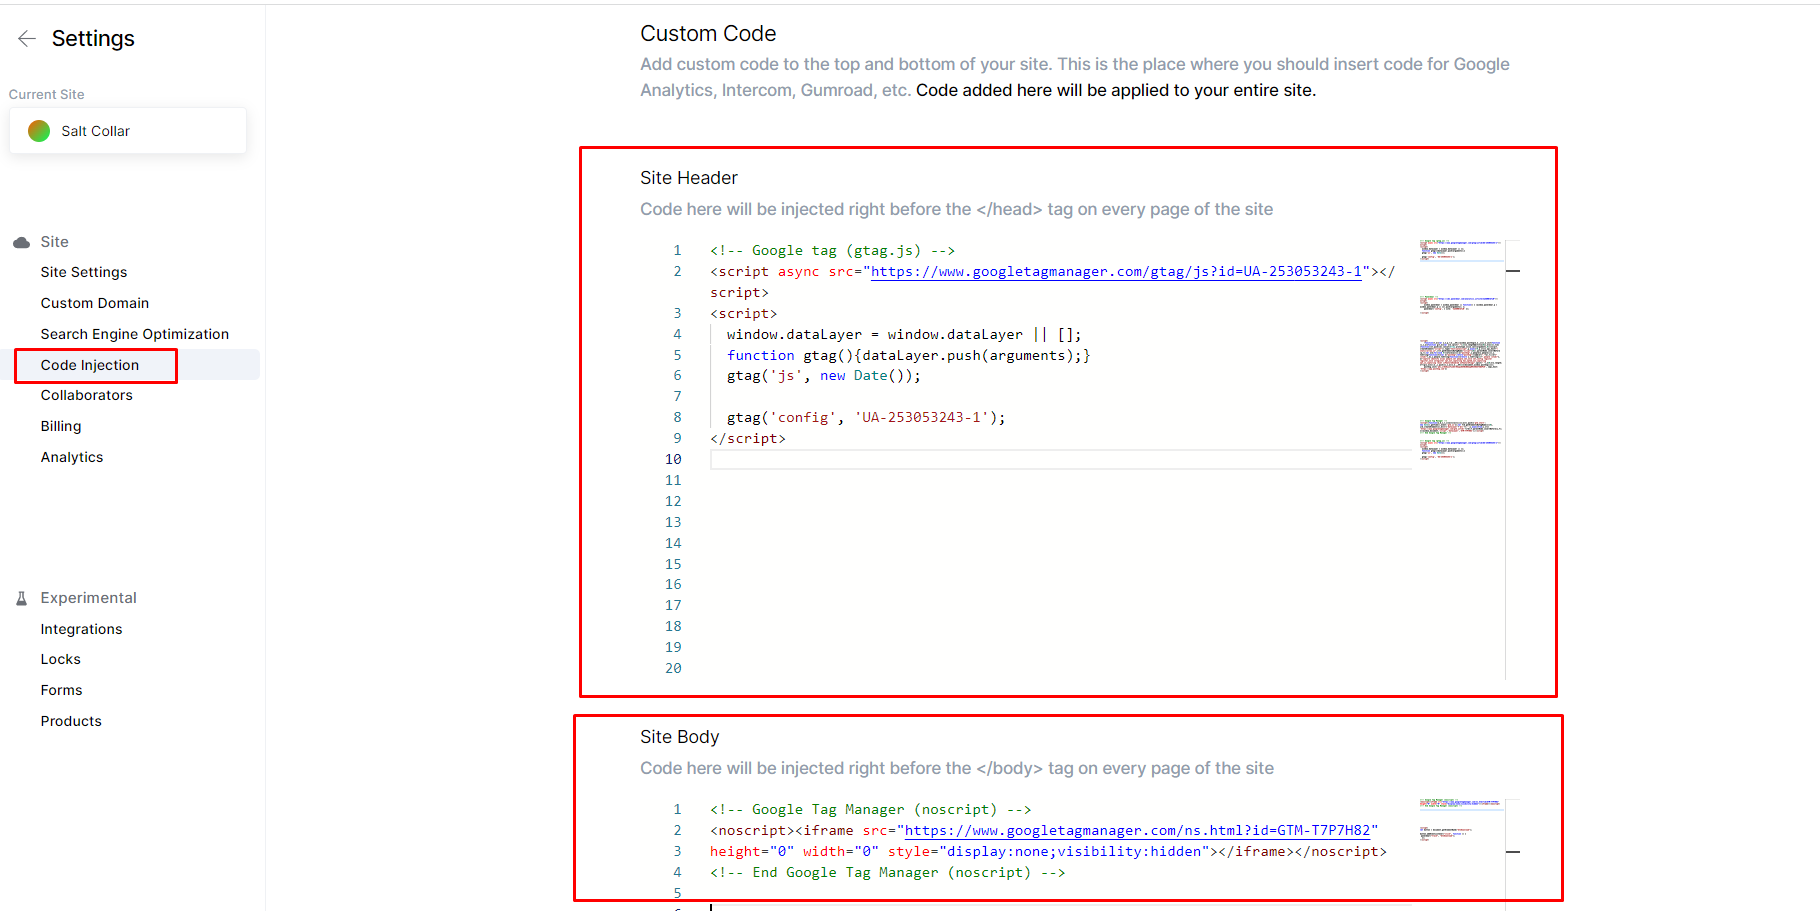
- Input the code installation in site settings > code injection in typedream You can find the tracking code in Admin > property > tracking info > tracking code
- Then you can enter the tracking code on site settings > code injection on typedream > Update Setting > Publish your site
Step 3: Create a tag manager account
- Create a tag manager account
- Create a Google Analytics account if you don't have an account via the following link : https://tagmanager.google.com/?authuser=1#/home
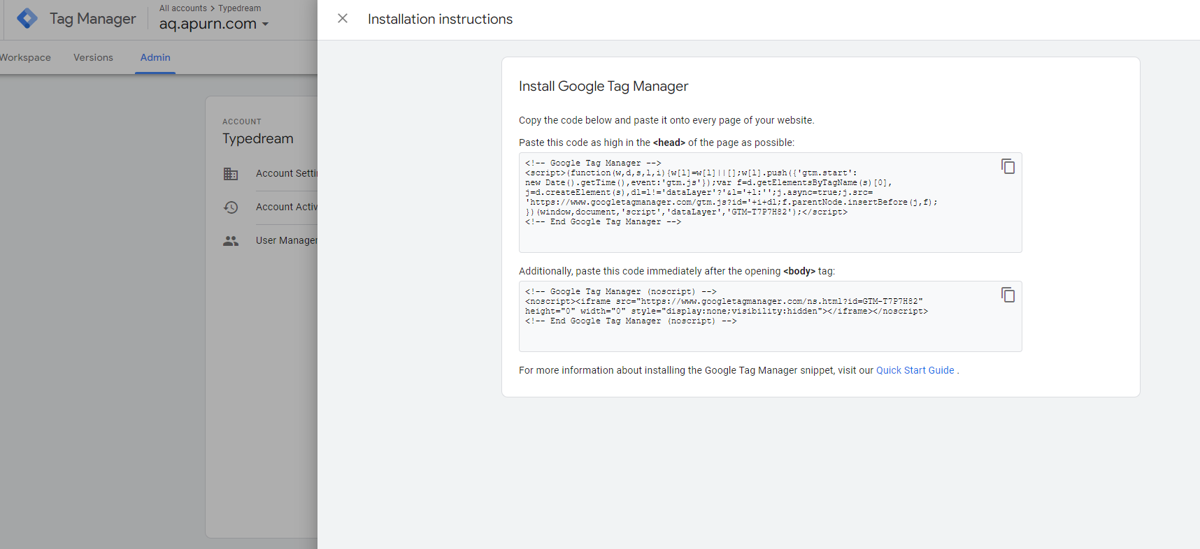
- Input tracking code in site settings > code injection in typedream You can find the installation code in Admin > Install Google Tag Manager
Then you can enter the installation code on site settings > code injection on typedream > Update Setting > Publish your site
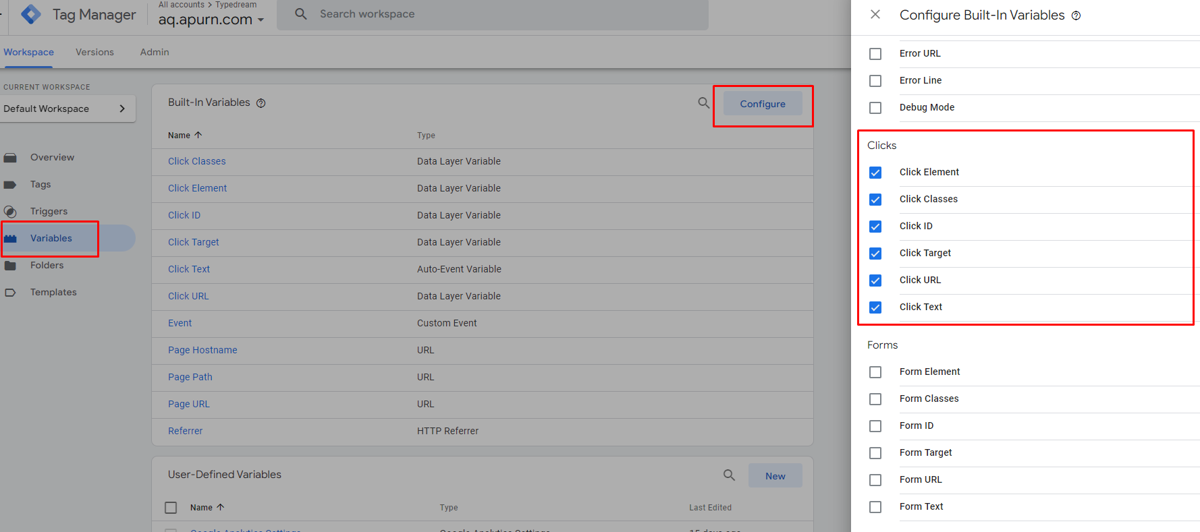
- Enable “Click Variables” in Google Tag Manager In your GTM workspace, navigate to Variables and click “Configure”. Next, scroll down to the “clicks” and enable all clicks variables. The selected variable will appear immediately in the list of built-in variables.
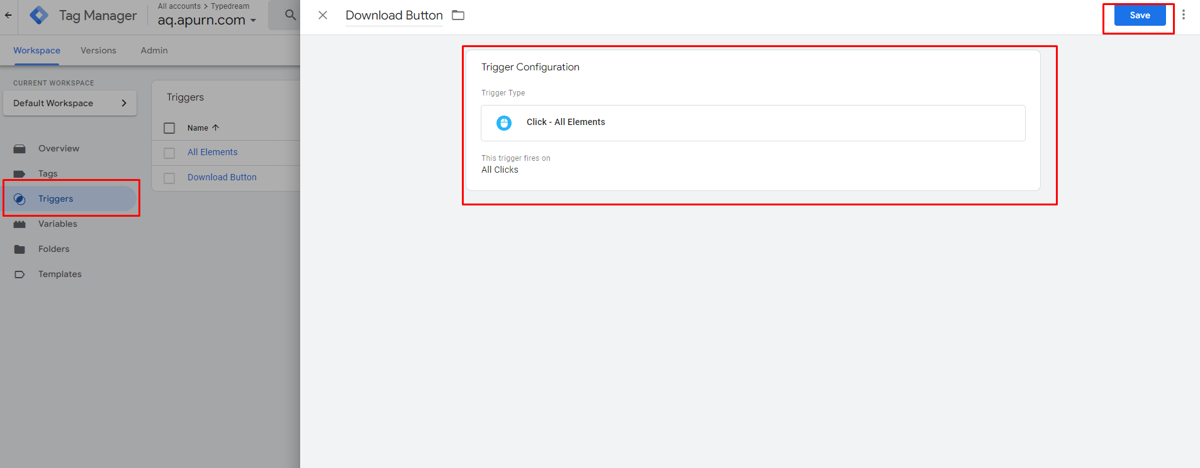
- Configure Click Elements as Triggers in Google Tag Manager We need to configure click elements and create a trigger. Navigate to “Triggers” in your GTM workspace -> add new trigger -> Click -> All Elements -> All clicks
We need to fire all clicks for now in order to identify the unique variables for the button you would like to track in Google Analytics. Later, we will come back and modify this click trigger to only fire for the selected button.
- Identify a unique variable for the button click
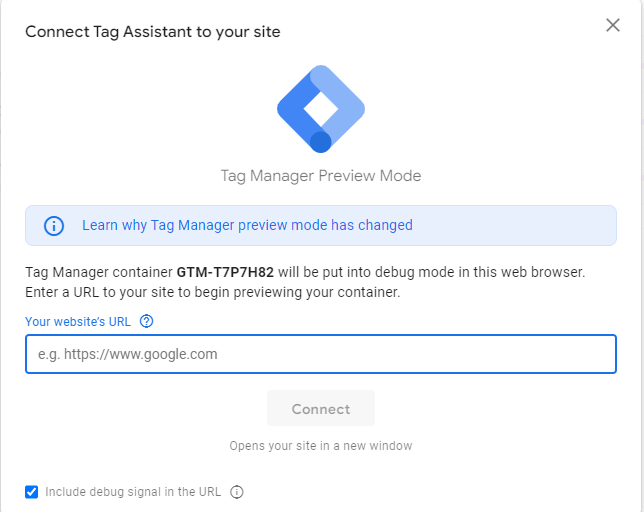
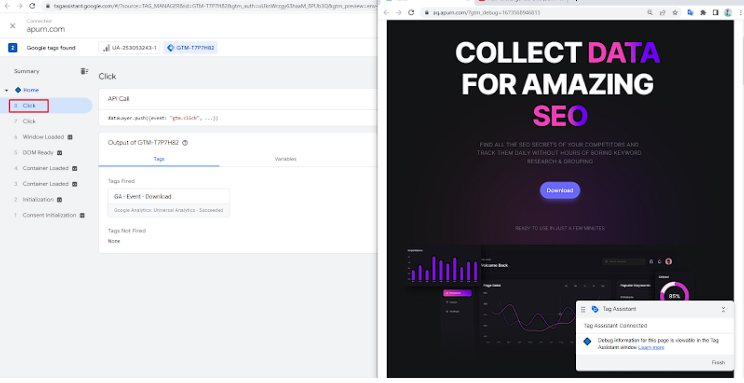
- Enter your domain to open the debugger. Your website will load in a new tab and in the right corner you will see the button Preview. Please note, if you use the Tag Assistant Legacy (by Google) Chrome extension, you may have to reload the extension for the debugger to connect successfully.
- In the tab of the domain, you can now locate your button and click it. For illustration, I will use download button.:When I click the button, you will see in the debugger tab that all actions in the backend have been monitored.
- You can find all previously enabled click elements in the variable section of the click.
- Go back to the “Generic Click” Trigger, adjust the trigger in Google Tag Manager In Google Tag Manager Workspace -> Triggers -> Your Trigger (ex. Button Click”) -> Change trigger to “Some Clicks” and select a unique identifier or combination of unique identifiers
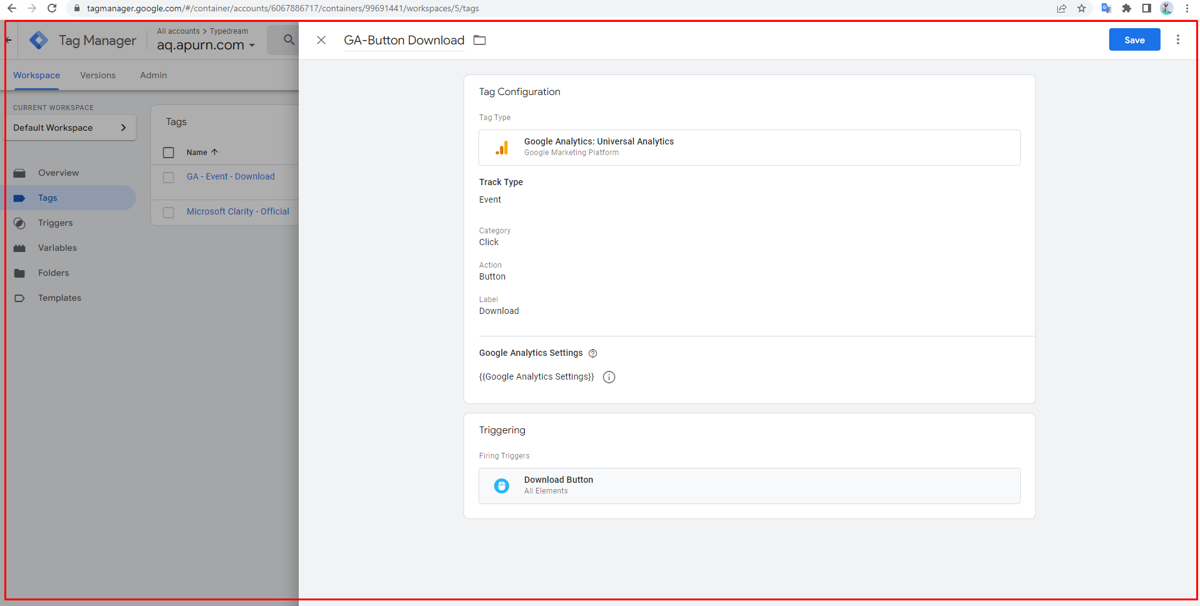
- Create an event “Tag” that connects your trigger to a Google Analytics event Go to Workspace -> Tag -> New -> Tag Type = Google Analytics Universal Analytics -> Track type = Event: Now you need to add an event category, action, label, and value (optional). It doesn’t matter what values you assign to each field, as long as it makes sense in your Google Analytics reporting naming convention.
Choose the trigger you’ve modified in the previous step. Click Save
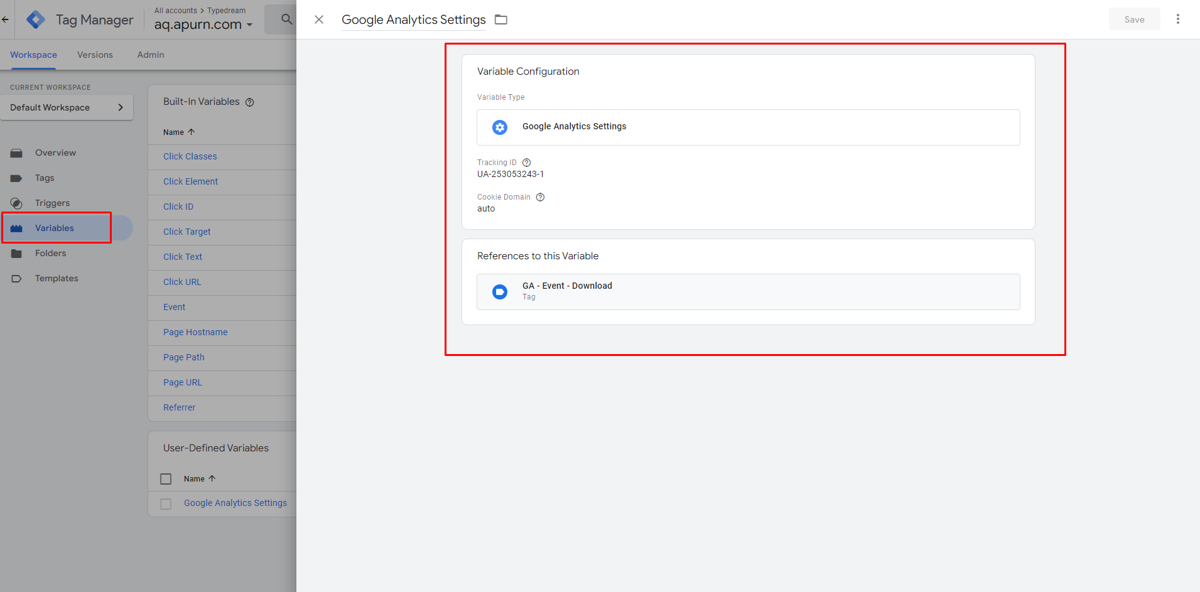
- Setting User defined variable. Go to Variable > User defined variable Make sure the tracking id matches your Google Analytics account
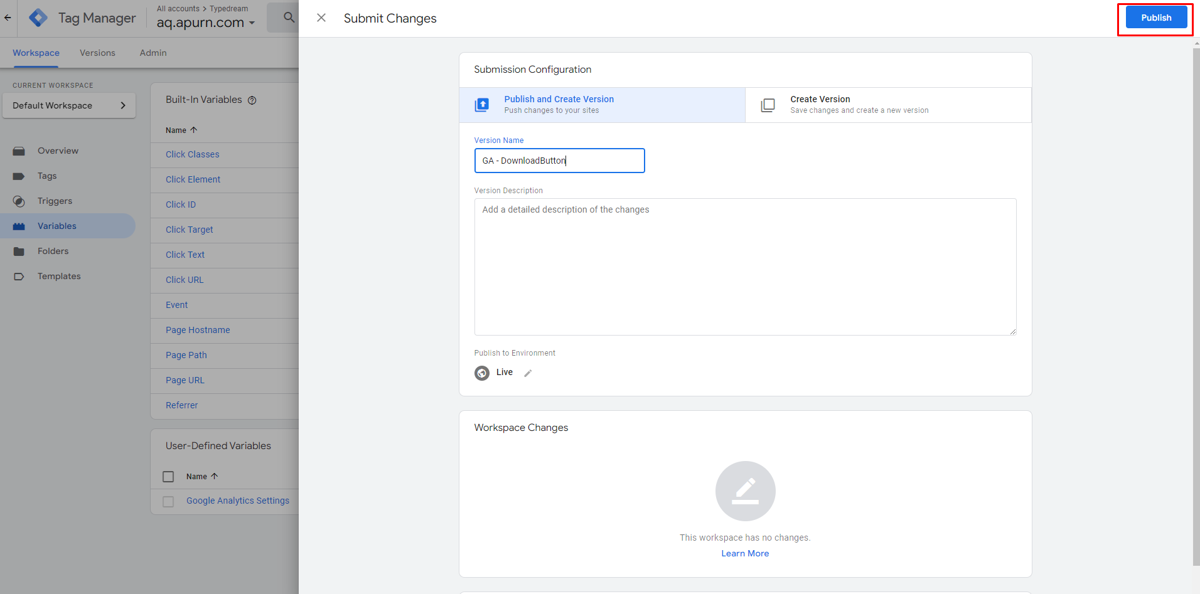
- Submit and publish the Google Tag Manager workspace changes Submit and publish the changes to activate the tag and trigger on your website. (Submit button in the main navigation)
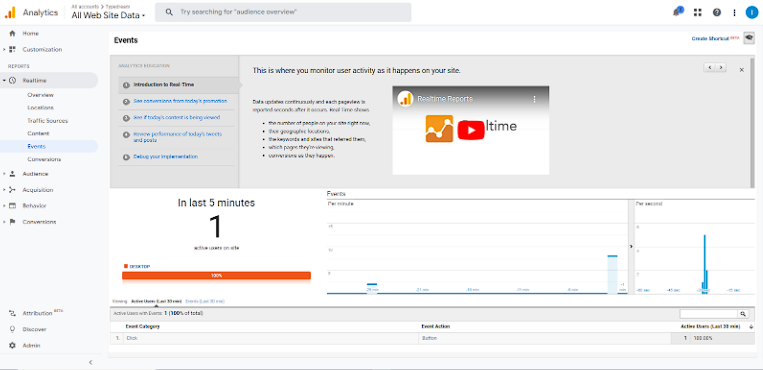
- Analytics, you should be able to see Events showing up as the Event Category, Event Action and Event Label you designated in tag manager
That's it! 🎉
Your link should now be able to see the button click events in your analytics provider.
We're a remote software company, building online tools for creators, builders, and side hustlers. We quit our 9-5 to pursue our dreams, and we want to help others do the same.
Copyright © 2025 beehiiv, Inc. All rights reserved.
