Last edited on July 9, 2021
How to add custom fonts.
You can add more fonts using Google Fonts by using the Code Injection feature.
1. Go to Google Fonts and copy the import code
Go to Google Fonts, select the font that you like:
- Select styles (regular, bold, etc)
- Click View your Selected Families on the right top corner
- Copy the code

Copy the code to import fonts from Google Fonts
2. Paste the code in Code Injection
Go to Settings > Code Injection, then paste the Google Fonts Code from Step 1
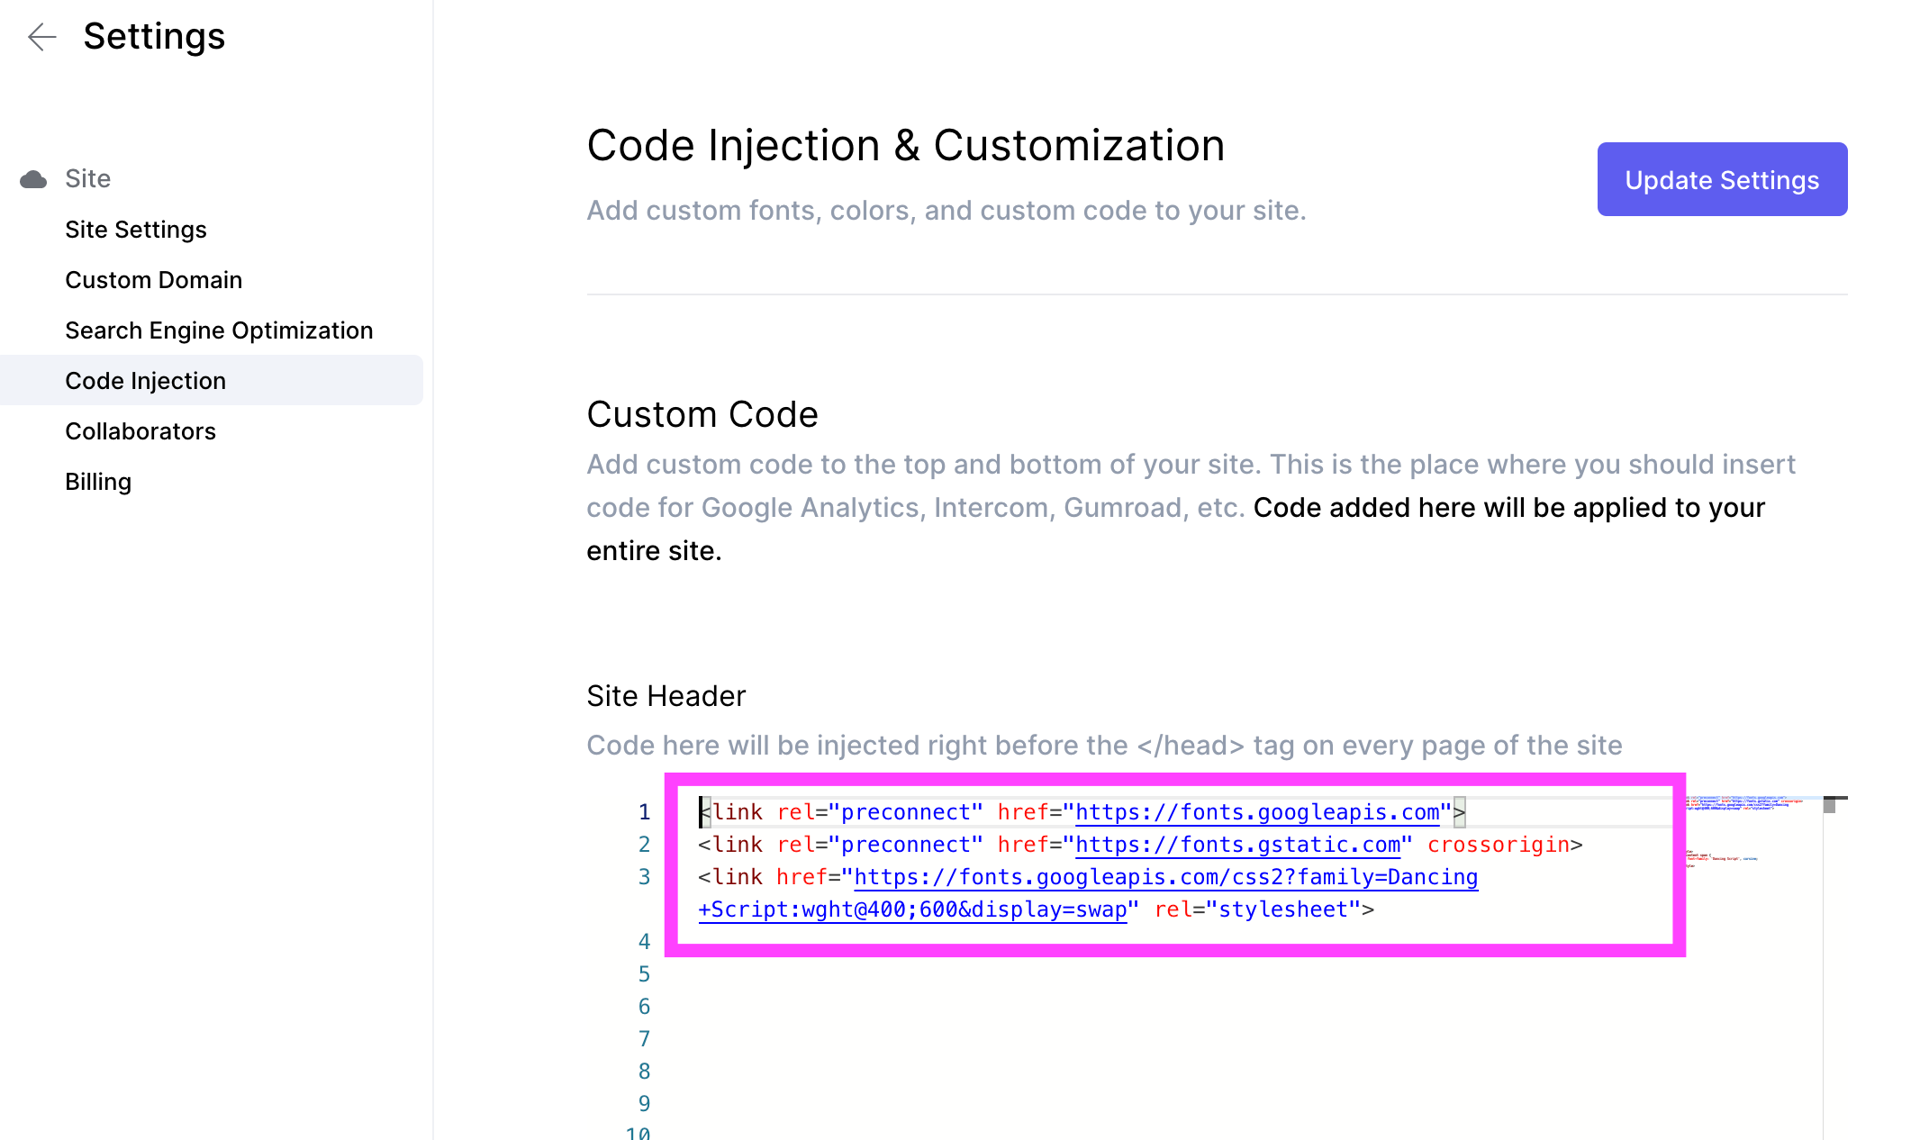
Paste in the code from Google Fonts to Settings > Code Injection
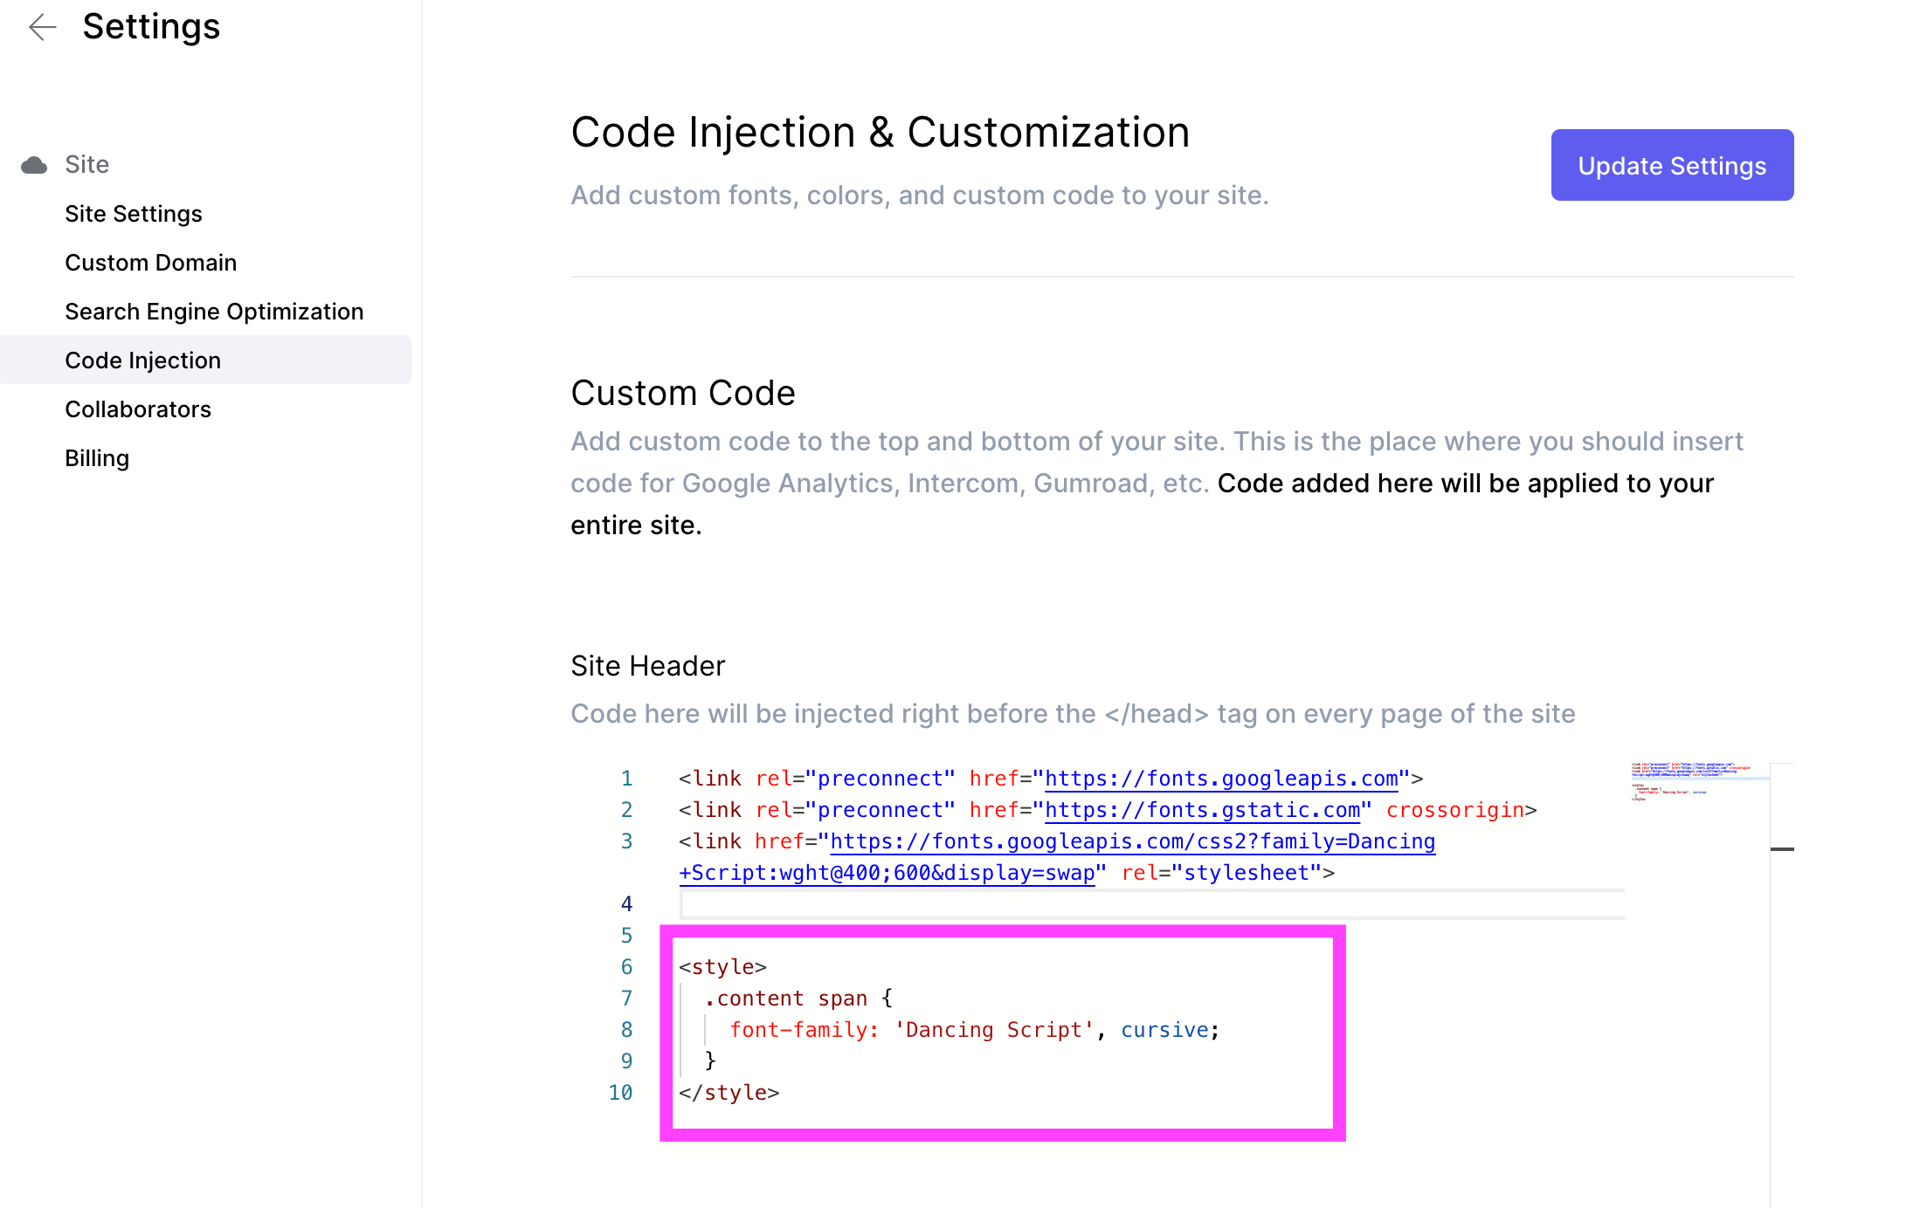
3. Update <style> to the page to use the new font
Below your pasted code above, add styling to the .content span element to cover the whole page.
Copy the CSS font style from Google Fonts:
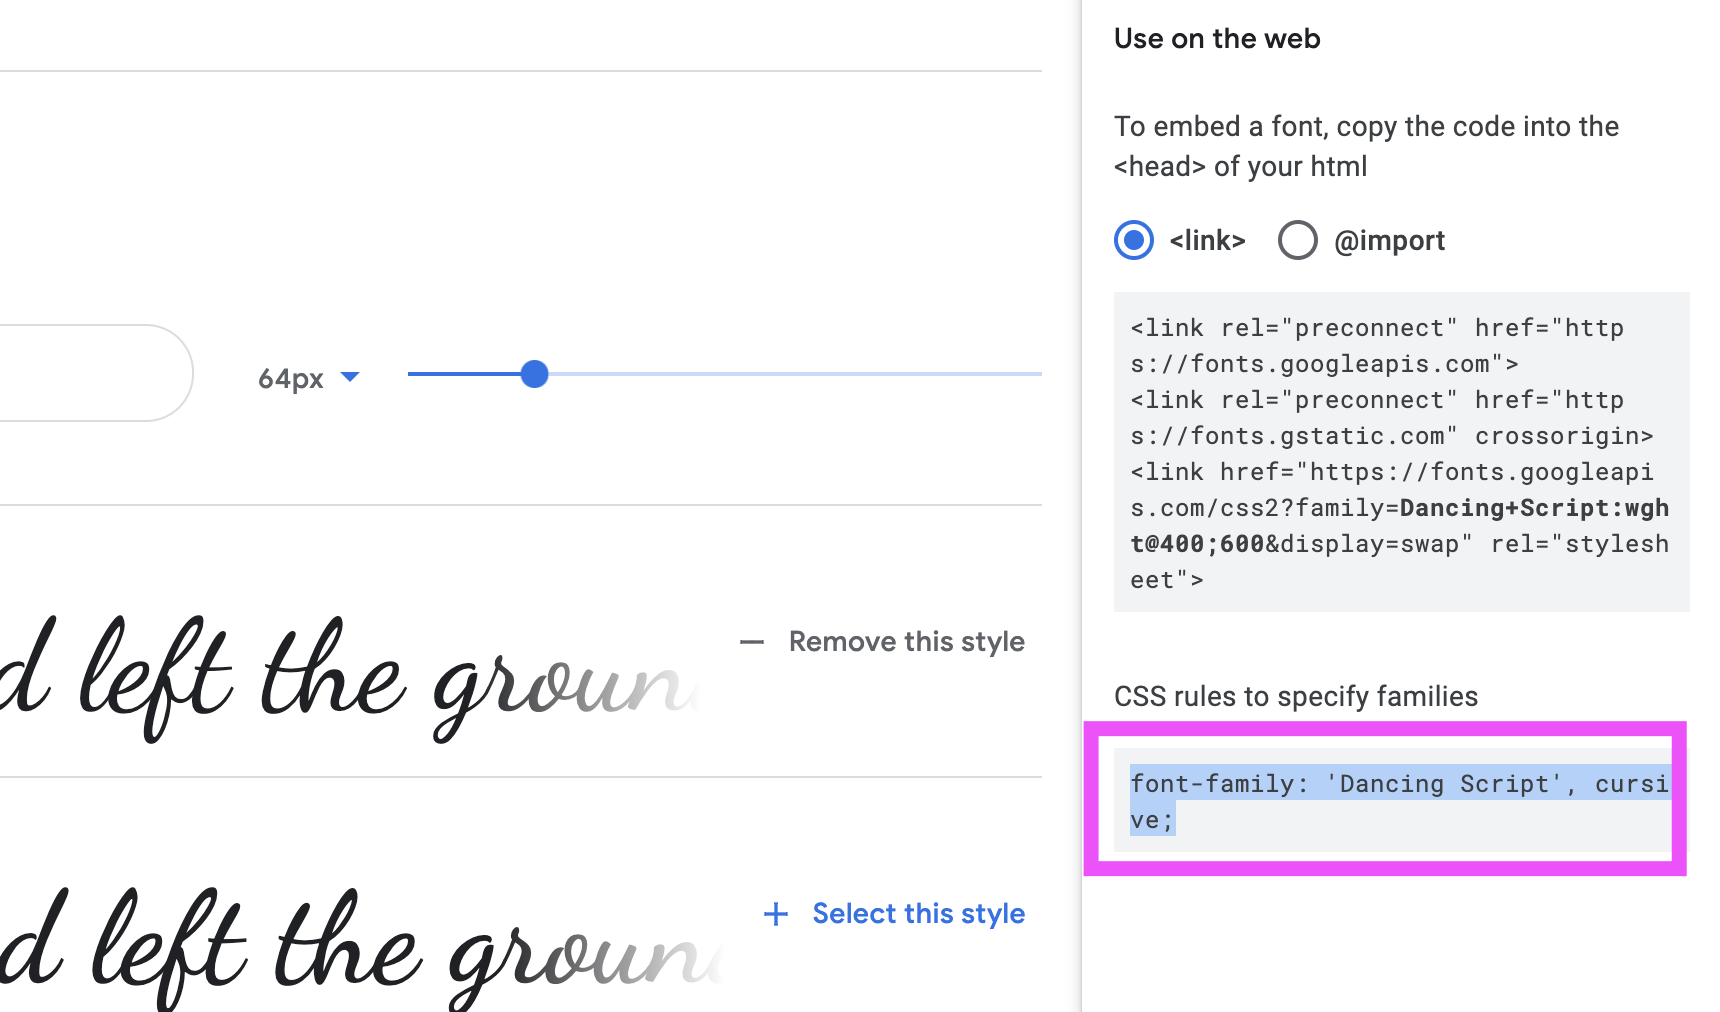
Then compose your CSS code like this:
<style>
    .content span {
      font-family: 'Dancing Script', cursive;
    }
</style>
Then paste it below your code in Site Header.
🎉 Done
Press Update Settings to show the changes.
Anything you add via Code Injection will not be reflected in the editor. Please publish your site and open the published version to see the changes.
For reference:
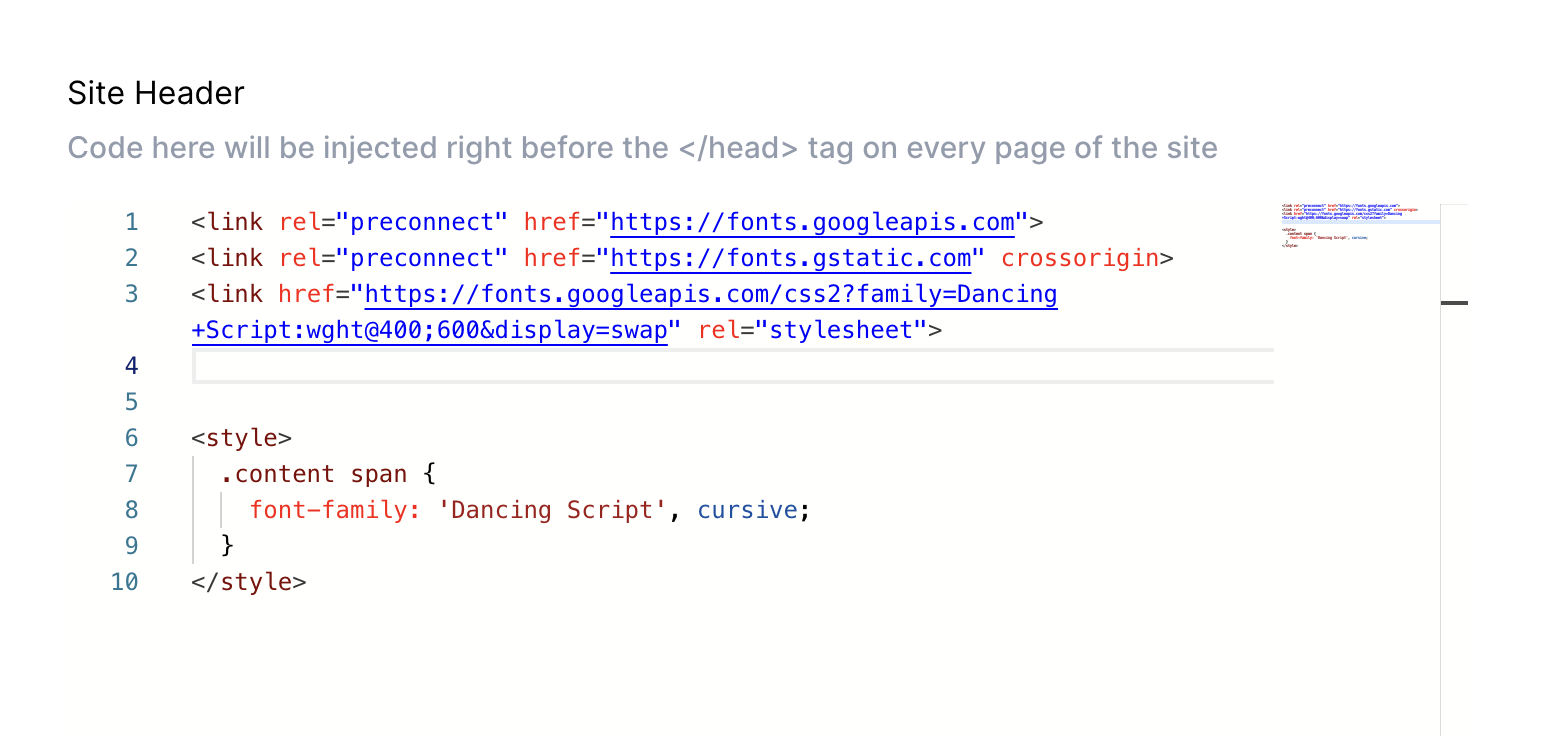
Here's the whole code that you need in Site Header:
<link rel="preconnect" href="https://fonts.googleapis.com">
<link rel="preconnect" href="https://fonts.gstatic.com" crossorigin>
<link href="https://fonts.googleapis.com/css2?family=Dancing+Script:wght@400;600&display=swap" rel="stylesheet">

<style>
    .content span {
      font-family: 'Dancing Script', cursive;
    }
</style>
Here's how your Site Header should look like in the end:
We're a remote software company, building online tools for creators, builders, and side hustlers. We quit our 9-5 to pursue our dreams, and we want to help others do the same.
Backed by
Copyright © 2023 Govest, Inc. All rights reserved.
Made in Typedream